MQTT Soil Moisture Sensor
First step for automating plants watering
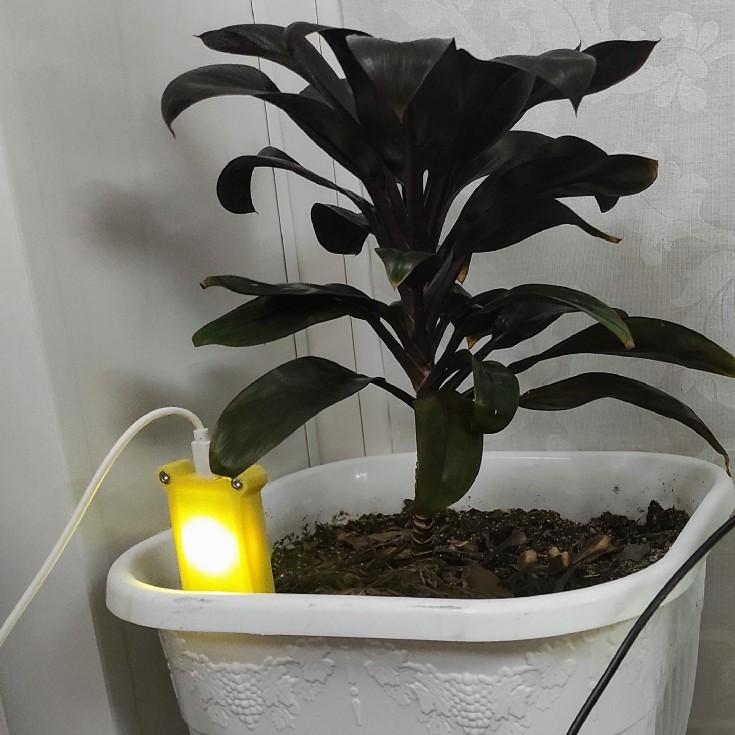
Today we continue to expand our network of connected devices by adding soil moisture sensors for houseplants to it.
The device wakes up every 5 minutes and publishes its readings to MQTT as a number from 0 to 1023, where lower values correspond to higher water content in the soil.
Having this data, we can either independently decide on the need for watering, or assemble a separate device that automatically waters.
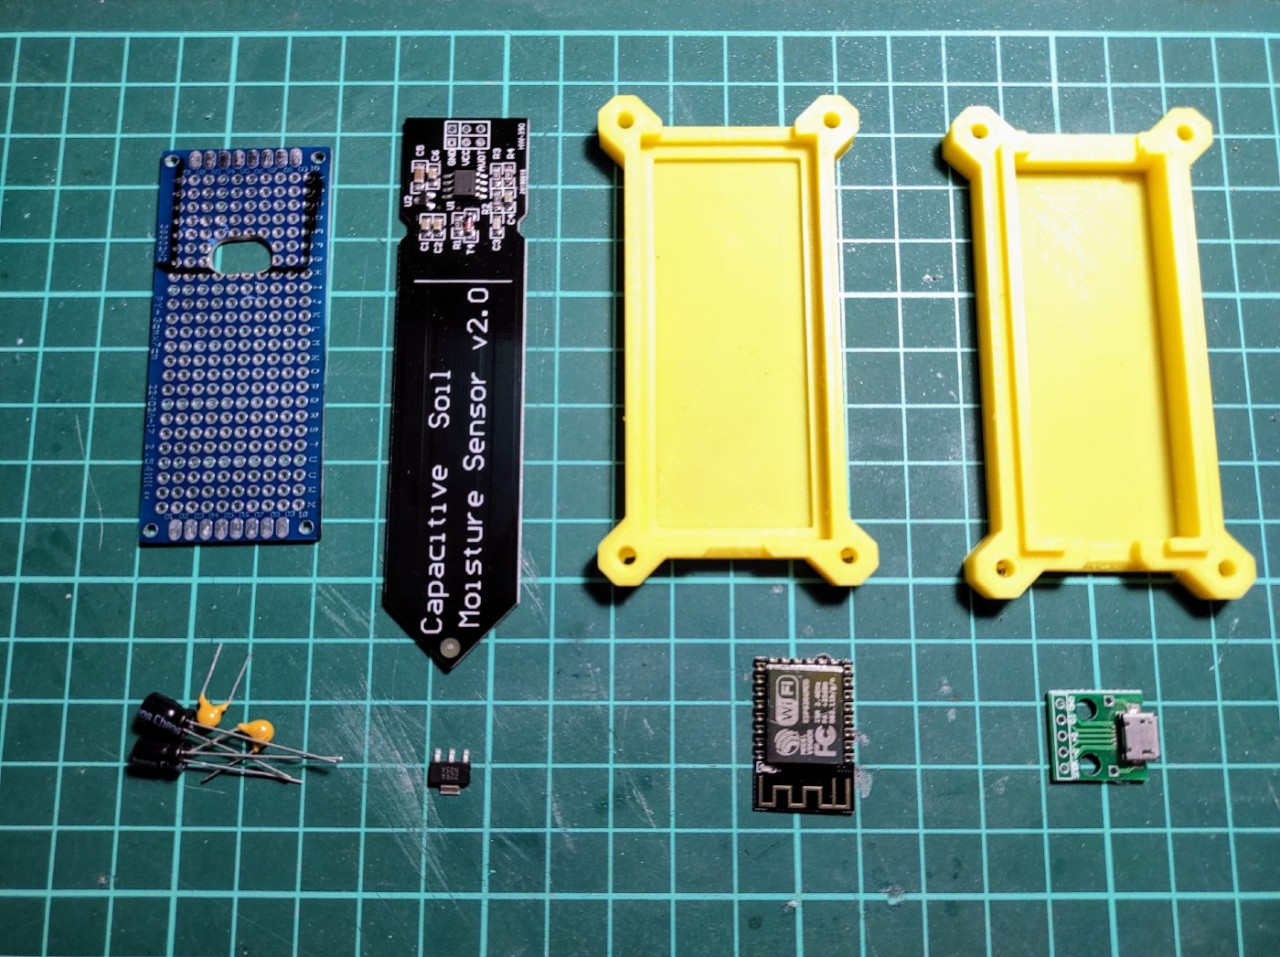
Materials
- ESP-12F module
- Capacitive soil moisture sensor
- Double sided breadboard 70x30
- Resistor 4.7k
- Resistors 100k and 47k
- Linear stabilizer LM1117–3.3
- Capacitors 10uF and 0.1uF, two each
- Breakout with micro-USB connector.
- Mounting wire
- 3D printed case and screws M3x10 with nuts
To flash the module, you will need a USB-UART converter with an output high logic level of 3.3V and a pair of temporary buttons for connecting to the RESET and FLASH pins.
Schematics
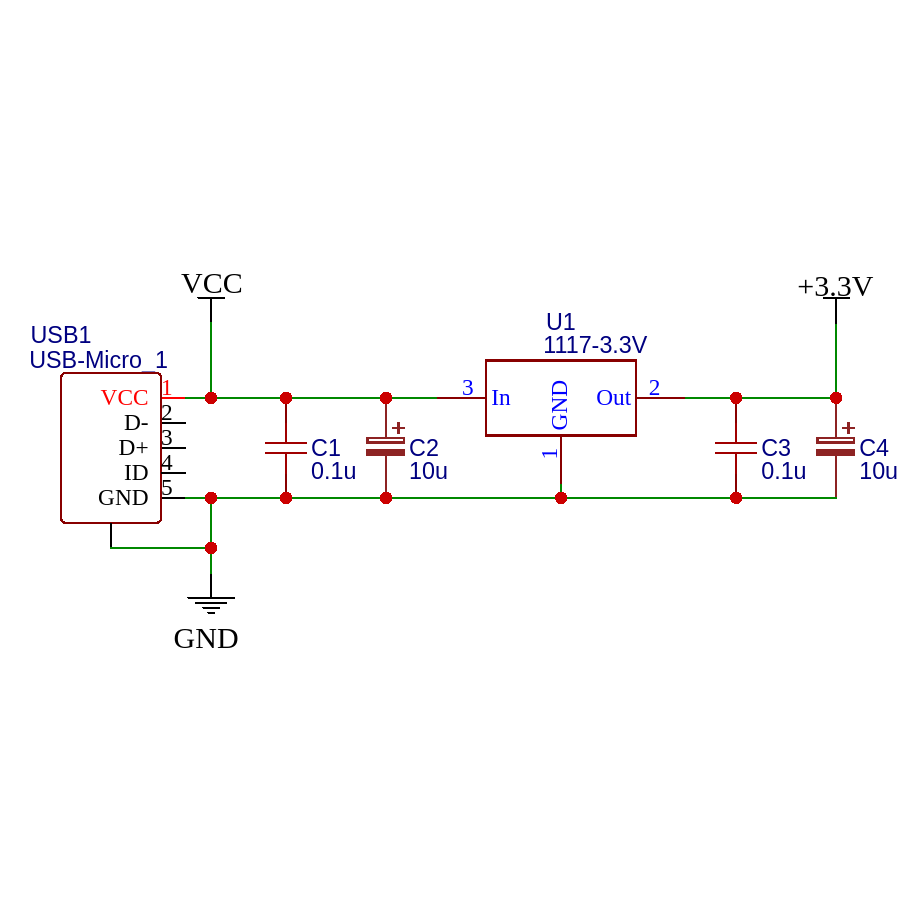
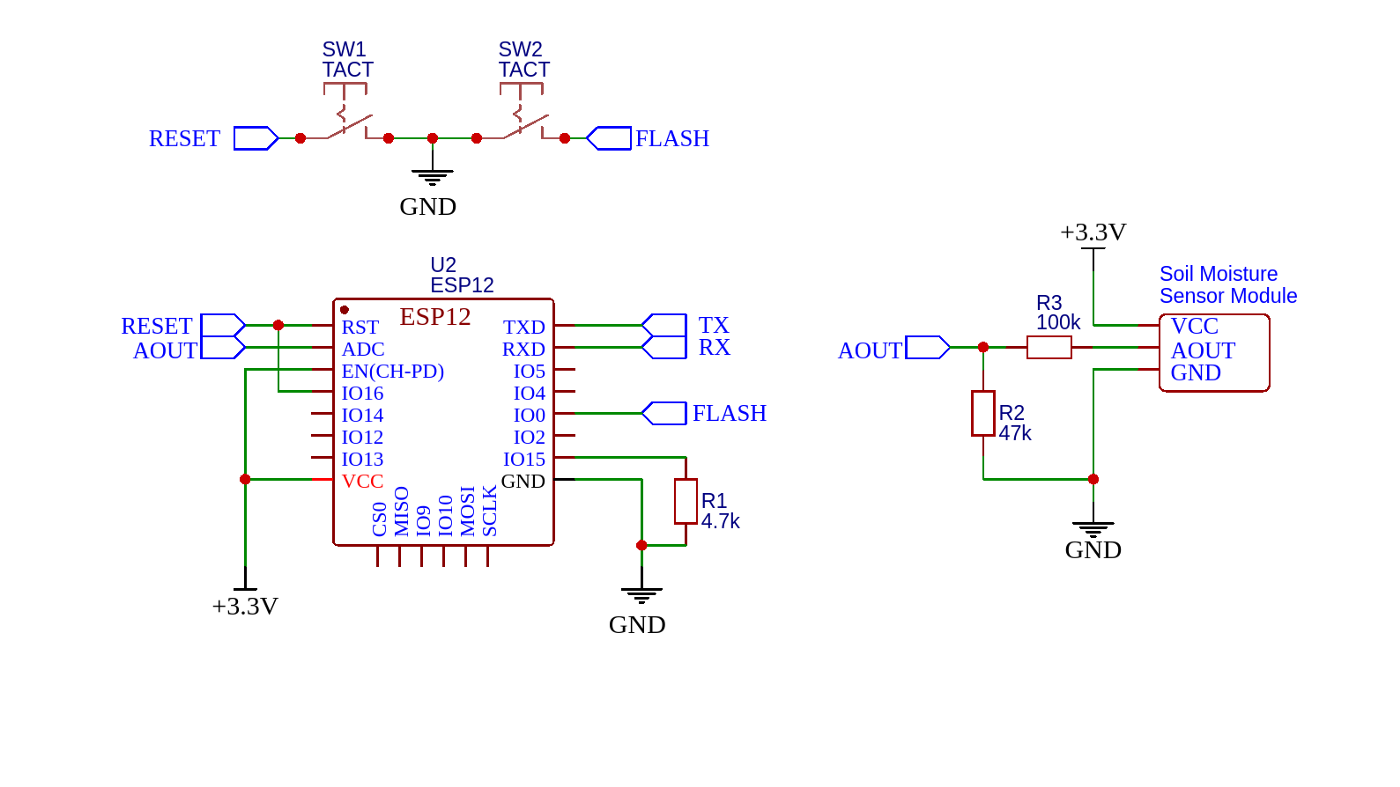
Since the ADC input of the ESP-12 module has a range from 0 to 1V, and the sensor output from 0 to 3V, a divider of resistors R2 and R3 is required.
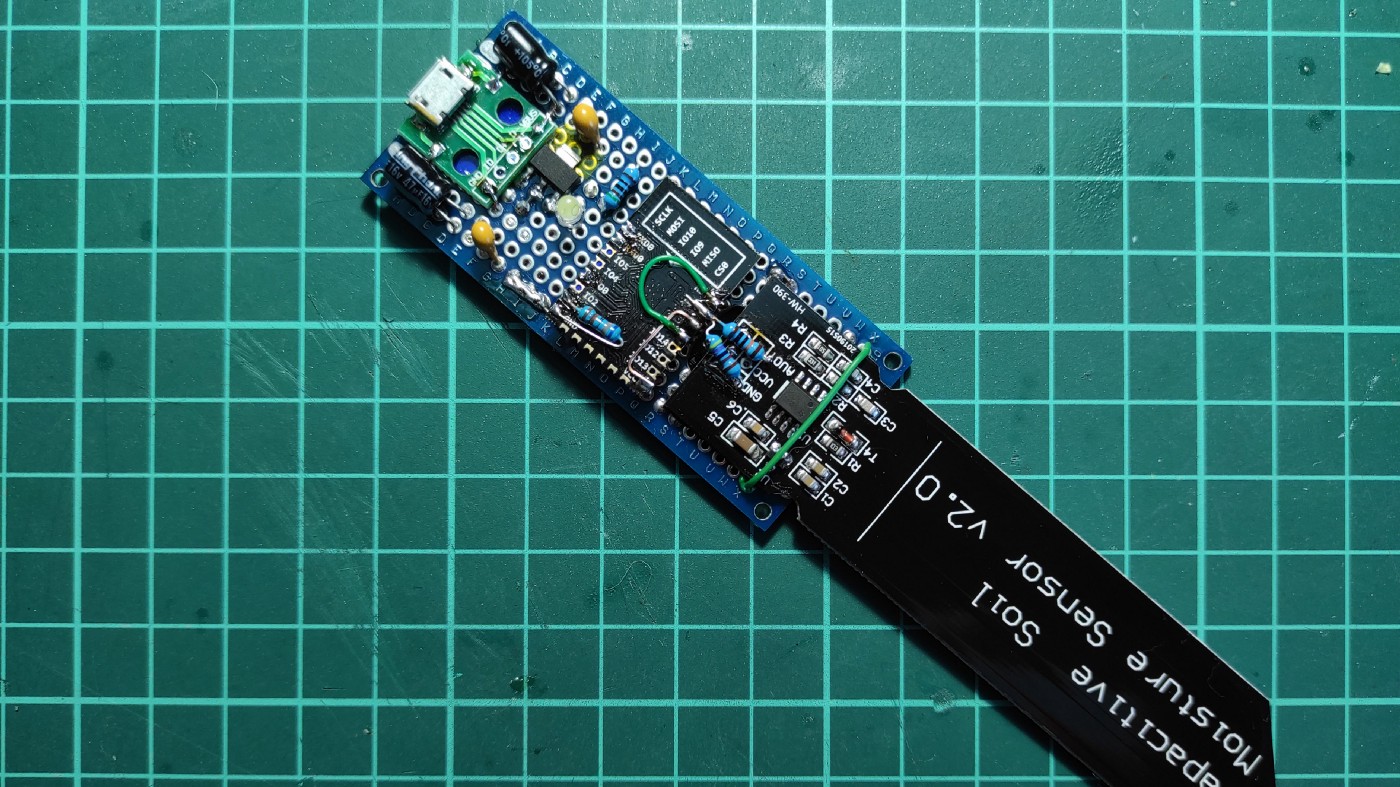
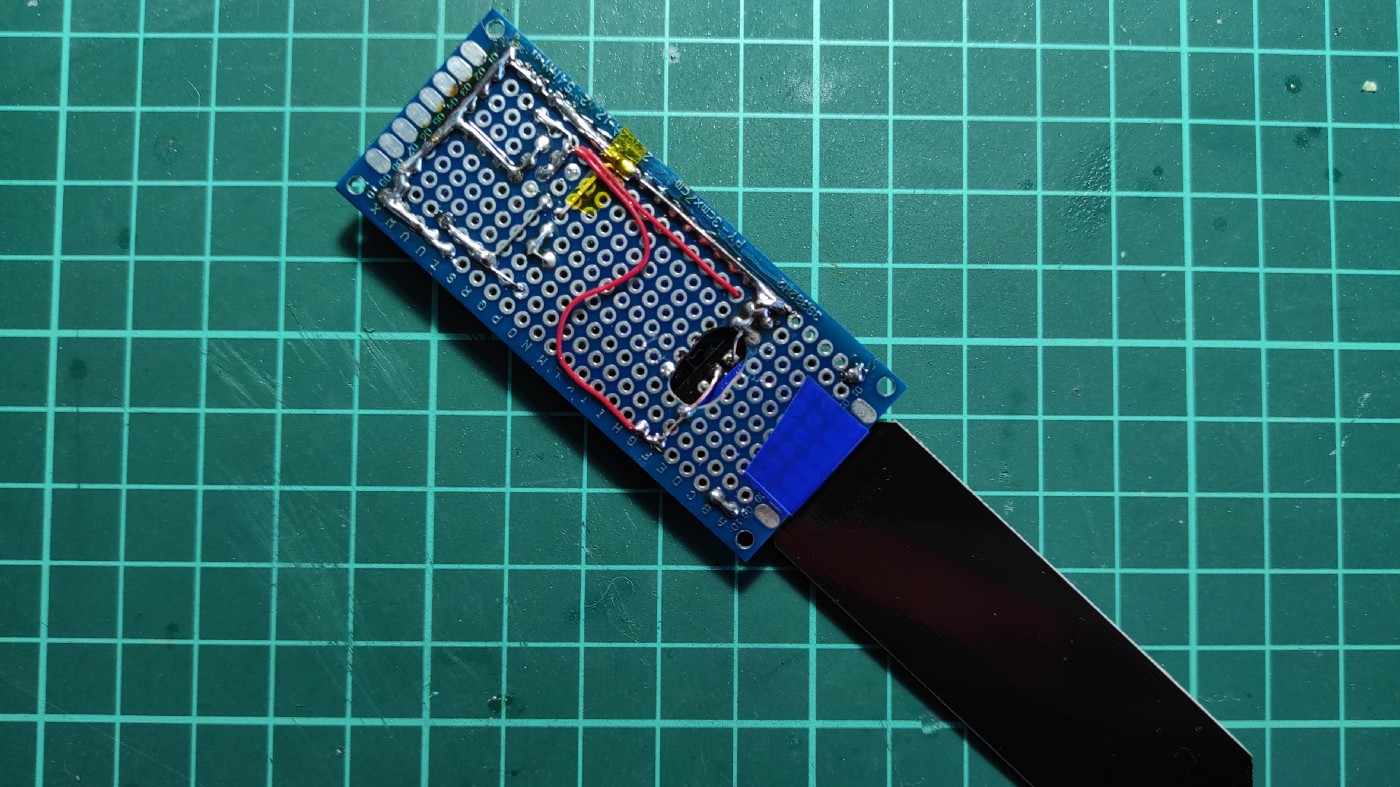
Assembly
I don’t have many plants, and a lot of 70x30 protoboards, so we’ll do without LUT again.
I had to cut a hole in the protoboard with a dremel so that I could place the sensor in the center.
Code
No additional libraries are required for the code to work, since the tools for working with the internal ADC are already available in the micropython standard library.
# boot.py

import gc
import network
import esp
esp.osdebug(None)
gc.collect()
# config.py

essid = "yourWiFiSSID"
password = "yourWiFiPassword"

TIMEZONE = 8

server = "192.168.0.10"
port = 19780
mqttuser = "mqttlogin"
mqttpwd = "MQttPassWord123"

TOPIC_PREFIX = 'plant0/'

UPDATE_INTERVAL = 5 # Minutes
# main.py

import machine
import time
import ntptime
import ubinascii
from umqtt.simple import MQTTClient
from config import *


def initmqtt():
    client_id = ubinascii.hexlify(machine.unique_id())
    client = MQTTClient(client_id, MQTTSERVER, MQTTPORT, MQTTUSER, MQTTPWD)
    client.connect()
    print("MQTT Connected")
    return client


def connect():
    sta_if = network.WLAN(network.STA_IF)
    if not sta_if.isconnected():
        print("Connecting to {}...".format(ESSID))
        sta_if.active(True)
        sta_if.connect(ESSID, PWD)
        while not sta_if.isconnected():
            pass
    print("Network config:", sta_if.ifconfig())

connect()

rtc = machine.RTC()
try:
    ntptime.settime()
    sec = time.time() + TIMEZONE * 3600
    localtime = time.localtime(sec)
except:
    print('Error setting time')
    time.sleep(10)
    machine.reset()

try:
    client = initmqtt()
except:
    print('Error initializing MQTT')
    time.sleep(10)
    machine.reset()


adc = machine.ADC(0)
moisture = adc.read()
print(moisture)

time.sleep_ms(1)

try:
    client.publish(TOPIC_PREFIX + "moisture", str(moisture), retain=True)
    time.sleep(1)
except:
    print('Error publishing to topic')
    time.sleep(10)
    reset()

rtc.irq(trigger=rtc.ALARM0, wake=machine.DEEPSLEEP)
rtc.alarm(rtc.ALARM0, time.ticks_ms() + UPDATE_INTERVAL*60*1000)
print('Entering deepsleep')
machine.deepsleep()
The data collection interval, which is five minutes by default, can be changed in the config.py.
Firmware
The firmware process is similar to that described at the end of the article about the ticker monitor.
Case
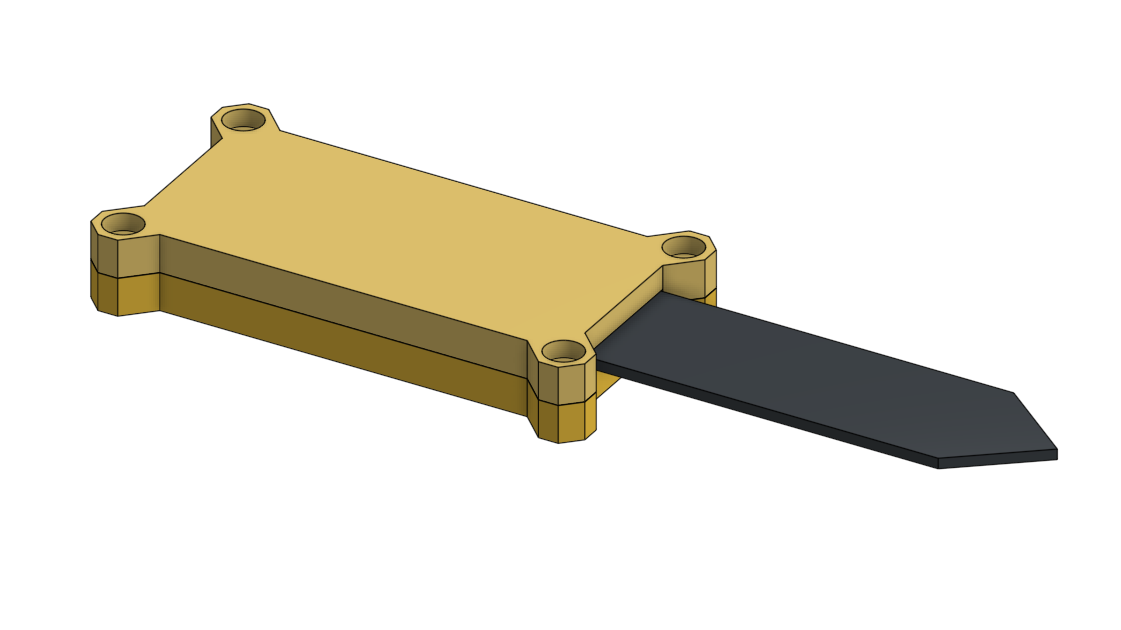
Case print files can be downloaded from the Onshape project.
After placing the board inside, it is desirable to fill with a compound (for example, hot glue, so beloved by many) the place where the sensor board exits from the case.
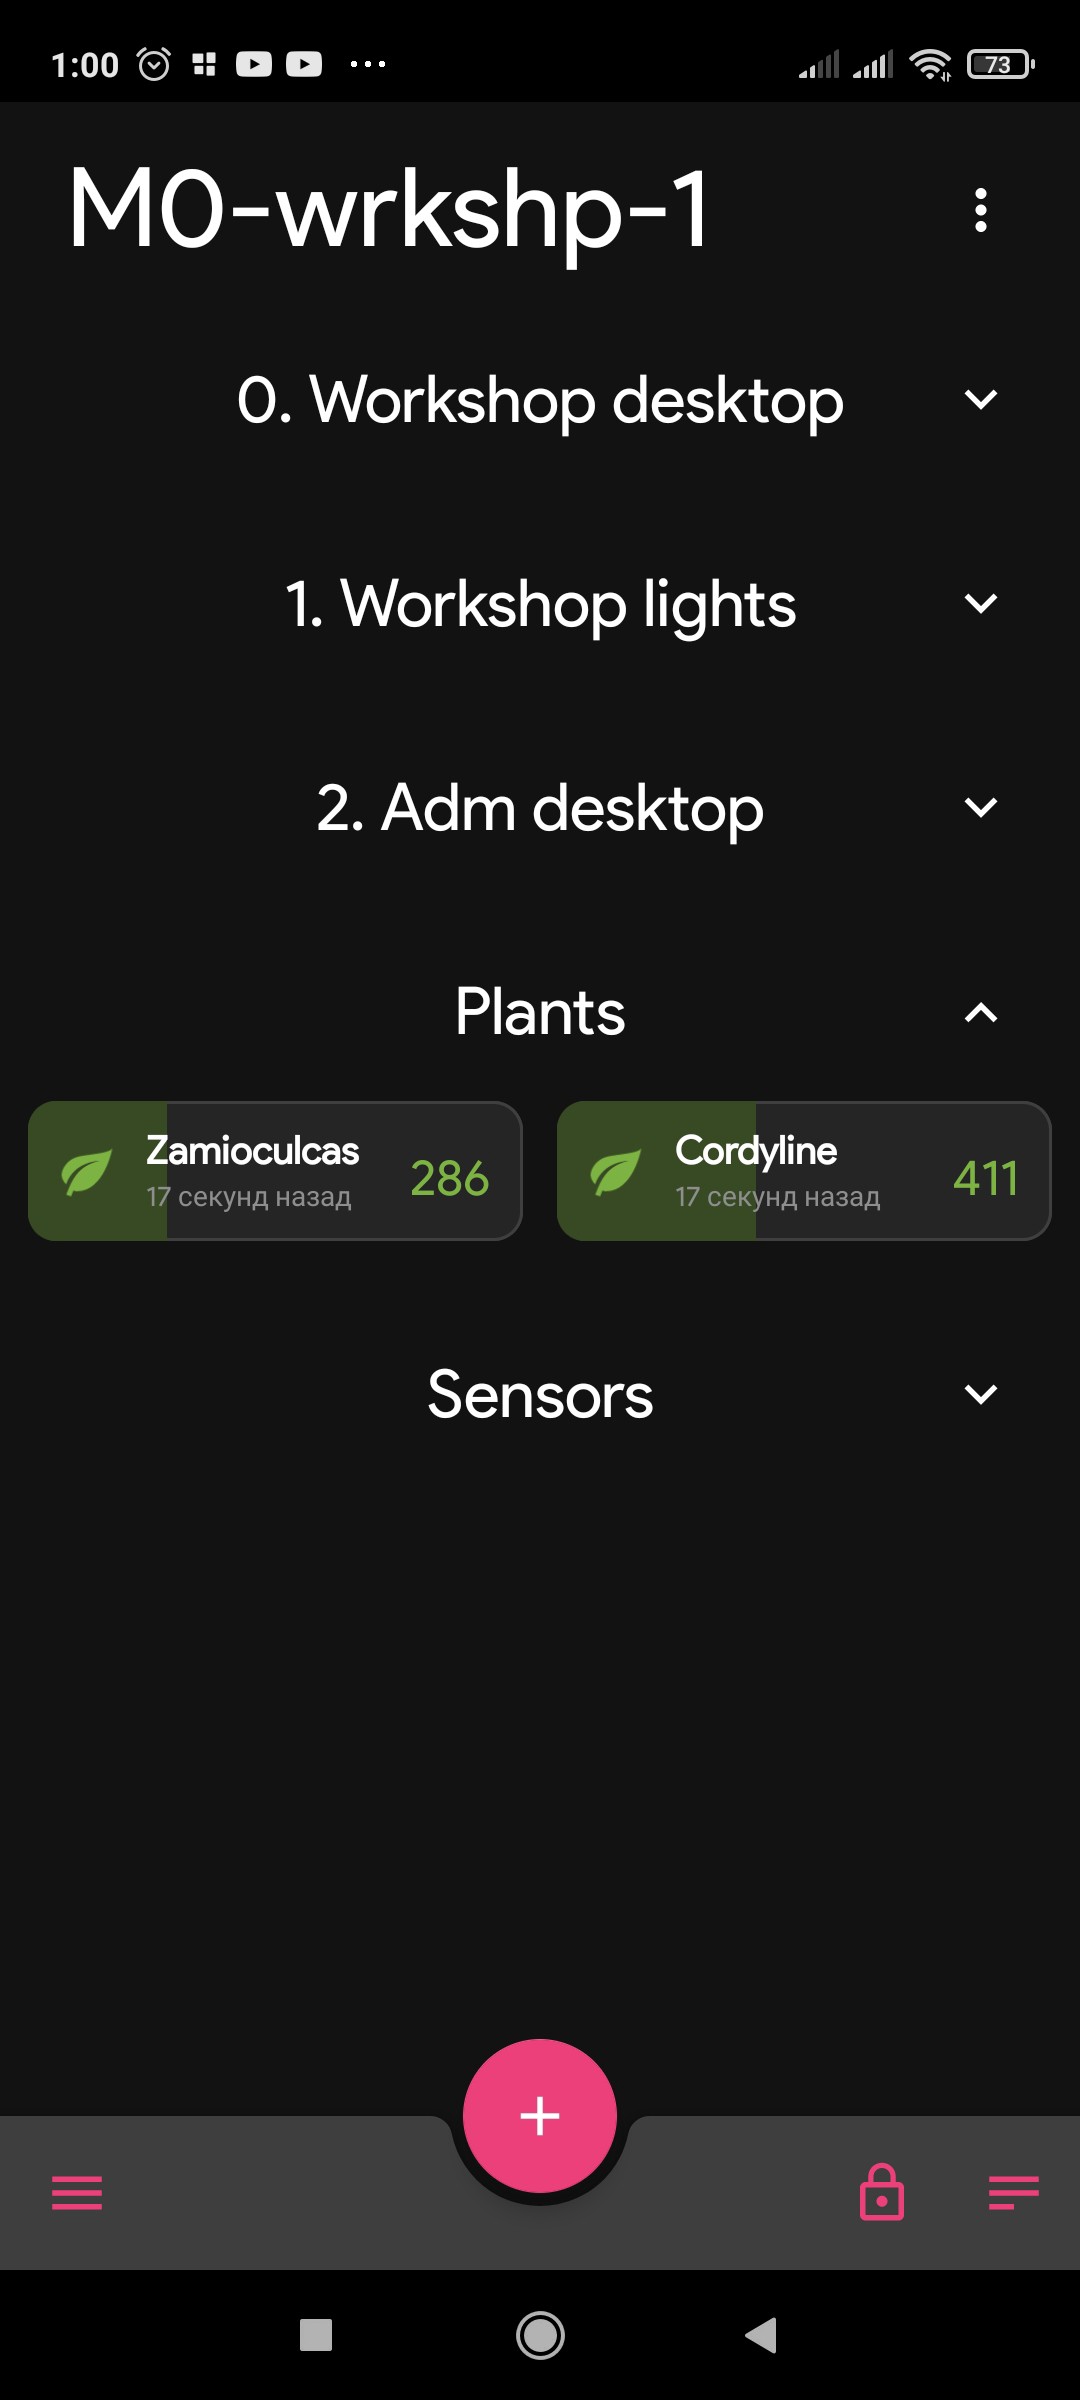
Dashboard
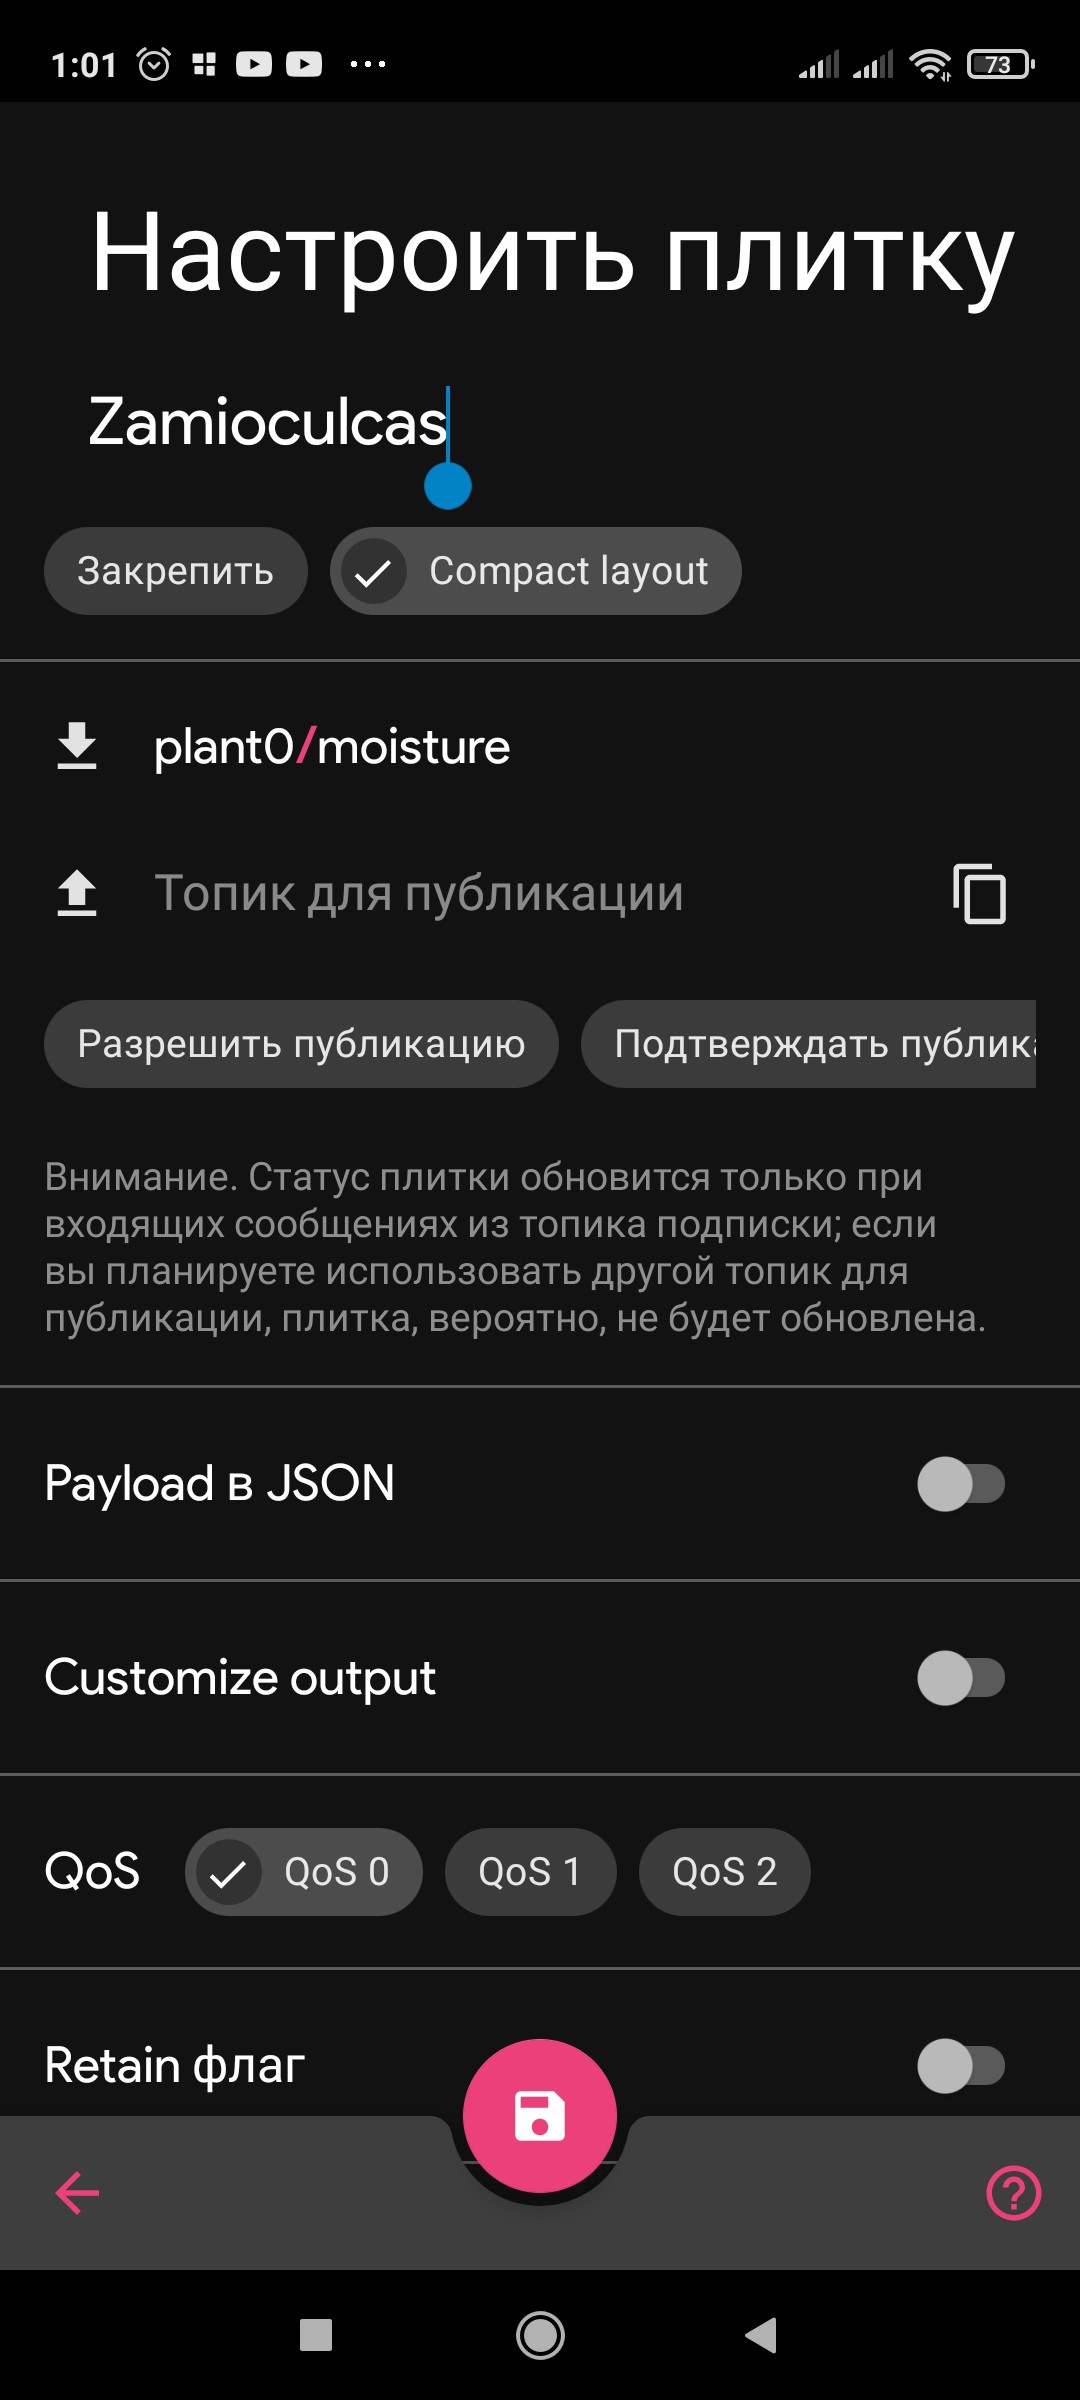
To display the readings from the sensor, add a tile of the “Progress” type to the Mqtt Dashboard and set its value limits from 0 to 1024.
Notes
With more houseplants than I have that require soil moisture monitoring, using these sensors can seem like a waste. In this case, it would be better to use the ESP8266 module, together with an external ADC chip. However, in this case it will be difficult to do without an industrially manufactured board (or at least a LUT).
In fact, the readings from the sensor range from 200 when fully immersed in water to 700 in air. This must be kept in mind when deciding on watering.
It would be worth adding the ability to measure temperature to the sensor, but I thought about this too late, when I had already packed everything into cases and stuck it into the ground. However, this is easy to do, for example, using an 18B20 digital thermometer and one resistor (support for the 1-wire interface is already in the standard library).
Conclusion
Thank you for your attention, and do not forget to water the indoor flowers.
Links
License
m0nochr0me
April 29, 2022